USB Gadget Mode in Raspberry Pi OS – SSH and Networking over USB
USB Gadget Mode in Raspberry Pi OS – SSH and Networking over USBDate of publication: 18-02-2026 🕒 5 min read
Using a headless Raspberry Pi outside your usual setup can quickly become inconvenient. Hotel rooms without spare Ethernet ports, Wi-Fi networks hidden behind captive portals, blocked local discovery protocols, or simply not knowing which IP address your board received — all of these can turn a simple task into an unnecessary distraction.
This is where Ethernet over USB becomes an extremely appealing concept. The idea is straightforward: connect the Raspberry Pi to your computer using a USB cable, and it shows up as a network interface, much like USB tethering on a smartphone. One cable is enough to provide power, network access, direct SSH connectivity, and — optionally — internet access shared from the host machine.
Historically, however, setting this up was far from seamless. Most solutions relied on manual system tweaks, outdated scripts, or platform-specific instructions that worked reliably on only one operating system at a time. Internet Connection Sharing (ICS) was often treated as an optional add-on rather than a core part of the workflow.
The goal of the new approach was to simplify this experience and deliver a clean, integrated solution that works equally well for first-time Raspberry Pi users and for larger headless deployments.
rpi-usb-gadget – USB Networking Made Simple
Starting with Raspberry Pi OS Trixie images dated 20 October 2025 or later, a new package called rpi-usb-gadget is included by default. It can be enabled directly from Raspberry Pi Imager using a single toggle.
Once activated:
- The Raspberry Pi presents itself as a USB Ethernet device
- You can connect via SSH immediately, without configuring Wi-Fi or Ethernet
- If Internet Connection Sharing is enabled on the host, the Raspberry Pi automatically gains internet access
- A lightweight background service monitors USB connectivity and network state, switching modes dynamically
- The overall behavior closely resembles USB tethering — but purpose-built for Raspberry Pi
The solution works across Windows, macOS, and Linux, with no manual mode selection required.
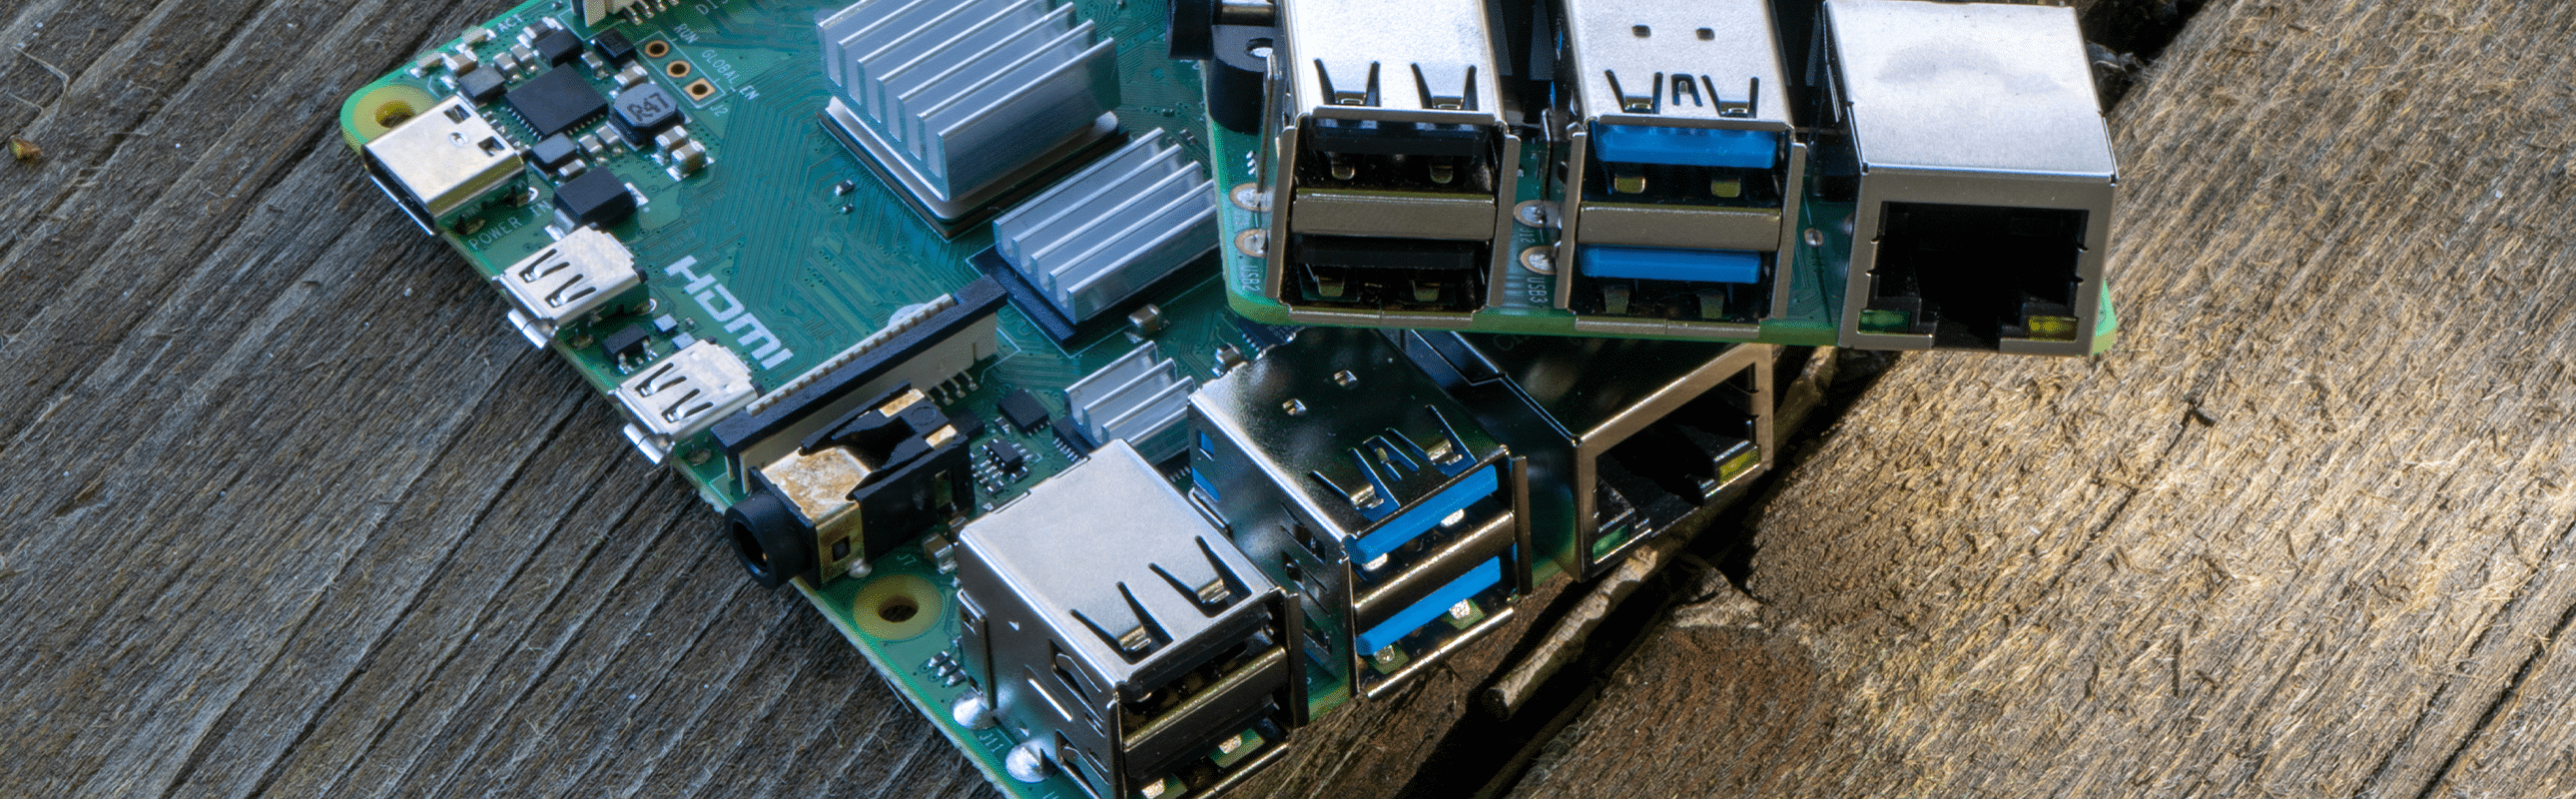
Hardware Requirements and USB Ports
USB Gadget Mode requires a port that supports USB OTG (device mode). Depending on the Raspberry Pi model, this is:
| Raspberry Pi model | USB port |
|---|---|
| Zero / Zero W / Zero 2 W | micro-USB port closest to HDMI (not “PWR IN”) |
| Raspberry Pi 4 / 5 / 500 / 500+ | onboard USB-C port |
| Compute Module 5 | USB-C on the CM5 IO Board |
| Compute Module 4 | manual configuration required |
Important: once gadget mode is enabled, the selected port functions exclusively as power input and USB networking. It can no longer be used as a regular USB host for keyboards, storage devices, or other peripherals.
Supported Boards
- Raspberry Pi Zero (W) and Zero 2 W
- Raspberry Pi 3 Model A+
- Raspberry Pi 4 Model B
- Raspberry Pi 5, Raspberry Pi 500, and 500+
- Compute Module 5
- Compute Module 4 (supported with additional setup)
For best stability — particularly on higher-power models — it is recommended to connect the Raspberry Pi directly to a USB port on the host PC. If power-related issues occur, using a Raspberry Pi USB 3 Hub allows external power delivery while keeping data routed over USB.
Enabling USB Gadget Mode with Raspberry Pi Imager
The easiest way to enable the feature is via Raspberry Pi Imager 2.0:
- Generate a capabilities-enabled os_list_local.rpi-imager-manifest file
- Double-click the generated manifest file to load it into Raspberry Pi Imager
- Select a Raspberry Pi OS Trixie image dated 20.10.2025 or newer
- Open the Customisation menu and enable SSH, then set a hostname
- The configured hostname will be used to connect to the Raspberry Pi via SSH
- Open Interfaces & Features and enable USB Gadget Mode
- Write the image, insert the storage medium into the Raspberry Pi, and connect it to the host using the correct USB/OTG port
- Power on the Raspberry Pi
The first boot may take longer than usual and may include an automatic reboot. This behavior is expected.
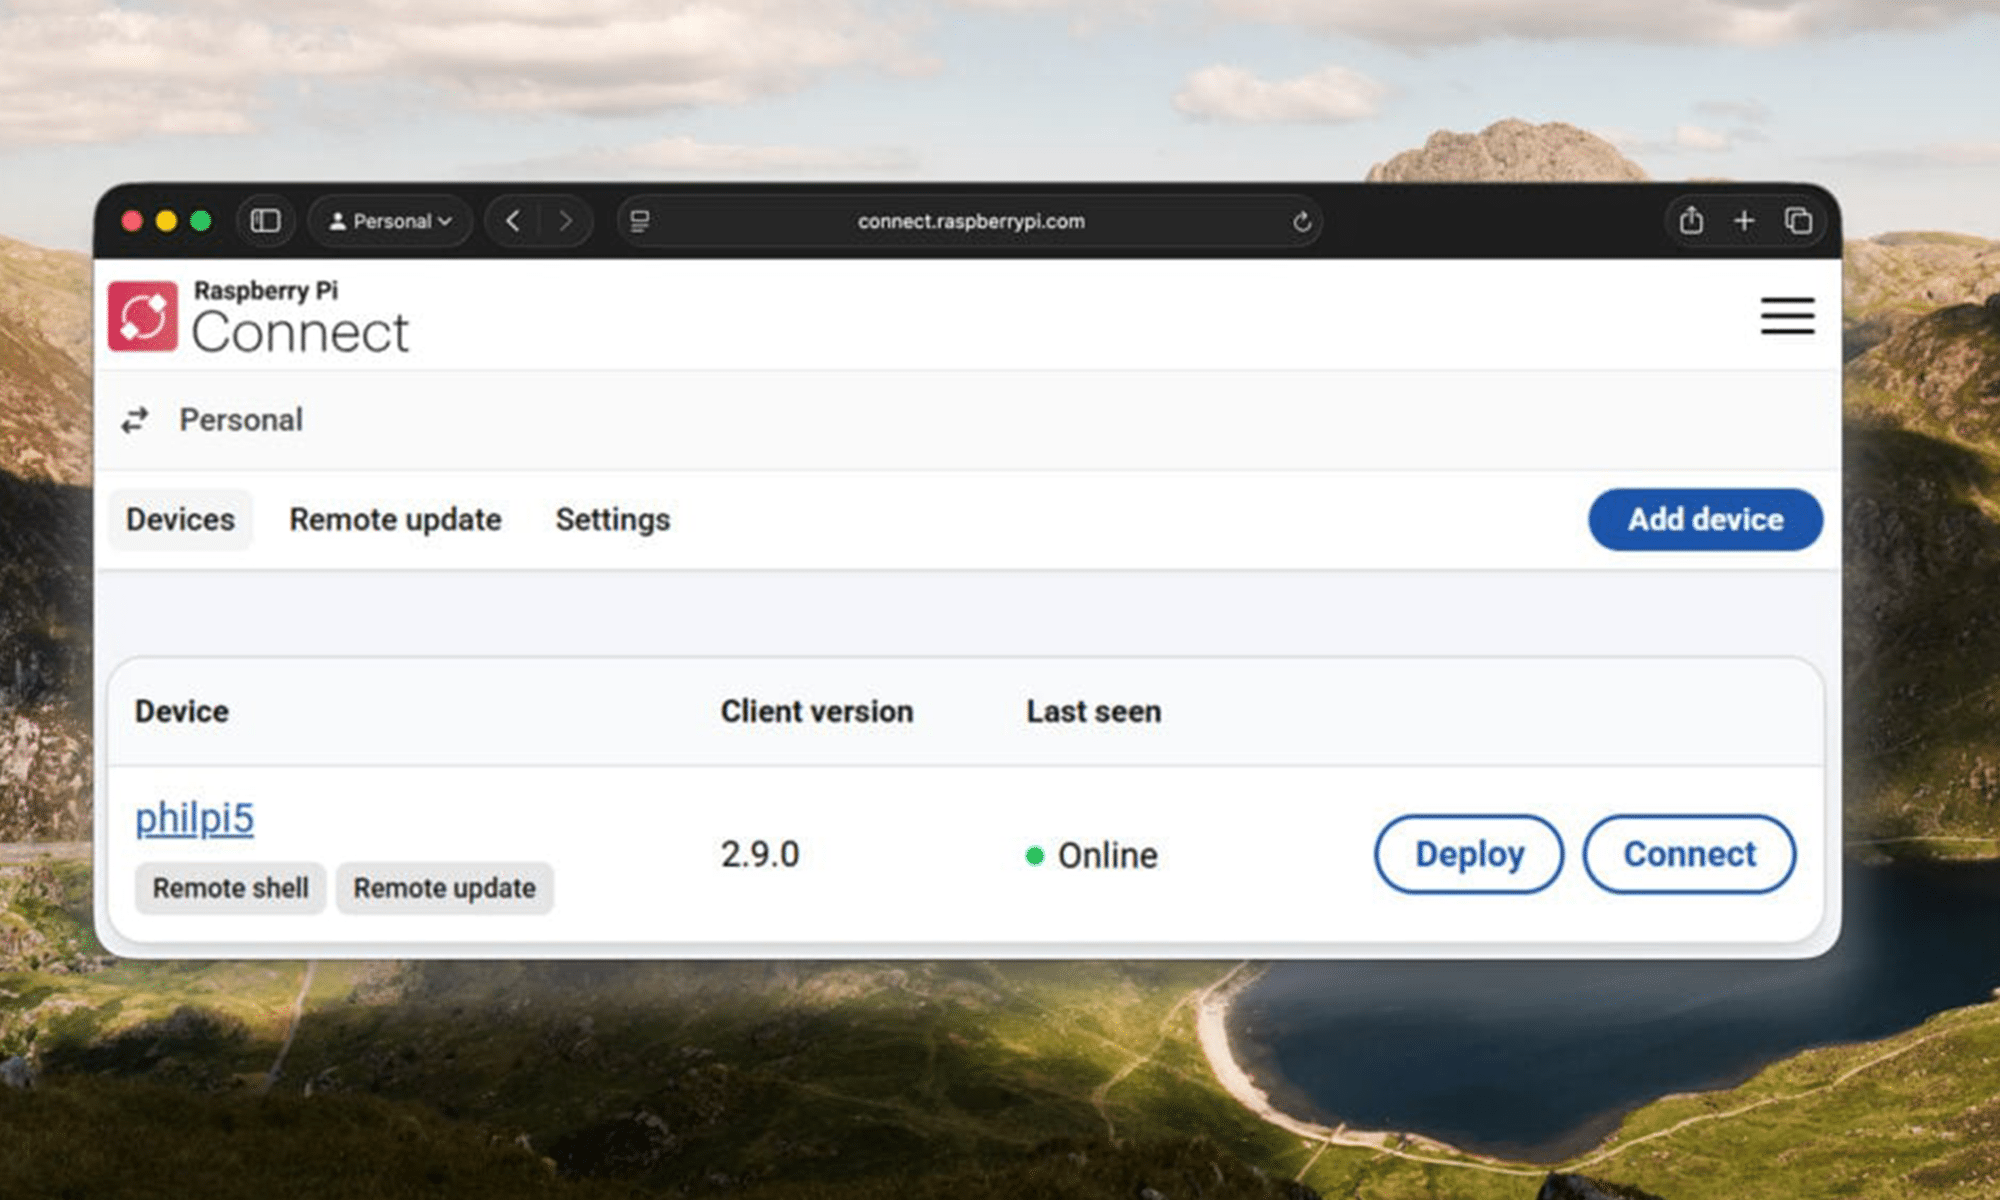
Once startup is complete, the Raspberry Pi should appear on the host system as a new Ethernet adapter, and SSH access using the configured hostname should be available.
Windows Driver Requirement
Windows does not include a native driver for USB Ethernet gadget devices. For this reason, a dedicated installer is provided:
rpi-usb-gadget-driver-setup.exe
This installation only needs to be performed once per Windows system.
Internet Connection Sharing (ICS)
To provide internet access to the Raspberry Pi over USB, Internet Connection Sharing must be enabled on the host computer.
On Windows
- Connect the Raspberry Pi and confirm that it appears as a new Ethernet adapter
- Open Network Connections (ncpa.cpl)
- Identify the primary internet-connected adapter (e.g. Wi-Fi) and open its properties
- In the Sharing tab, enable sharing and select the Raspberry Pi USB Ethernet adapter
- Confirm the settings
Within approximately one minute, the Raspberry Pi should receive an IP address.
Note on Windows ICS behavior:
If ICS is enabled while the Raspberry Pi is disconnected, Windows may bind its DHCP service to a different interface. In such cases, disabling ICS on all adapters, reconnecting the Raspberry Pi, and re-enabling ICS typically resolves the issue.
On macOS
- Connect the Raspberry Pi and wait for it to appear as a USB Ethernet device
- Open System Settings → General → Sharing → Internet Sharing
- Configure the internet source (e.g. Wi-Fi) and select the Raspberry Pi USB interface as the destination
- Enable Internet Sharing
On Linux
Enable routing and NAT between the primary internet interface and the Raspberry Pi USB gadget interface using NetworkManager or equivalent tools. The exact procedure depends on the distribution and networking stack in use.
Enabling USB gadget mode without Imager
This method applies only to Raspberry Pi OS Trixie–based systems.
Fresh images (before first boot)
USB gadget mode can be enabled automatically via cloud-init:
rpi:
 enable_usb_gadget: true
enable_ssh: true
It is strongly recommended to define a user account and SSH key in the same configuration file, as the setup wizard cannot be accessed over SSH and USB peripherals cannot be connected on Zero-class boards while gadget mode is active.
Existing system
- Verify that the system is running Raspberry Pi OS Trixie
- Install and enable the package:
sudo apt update
sudo apt install rpi-usb-gadget
sudo rpi-usb-gadget on
sudo reboot
After reboot, the USB port switches to gadget mode. Any active SSH sessions will briefly disconnect and automatically reconnect once the USB Ethernet interface becomes available.
Technical details
The rpi-usb-gadget package configures the g_ether USB gadget kernel module, exposing a virtual Ethernet interface that adapts to the host operating system:
- Windows hosts use RNDIS
- macOS and Linux hosts use CDC-ECM
The appropriate mode is selected automatically during USB descriptor negotiation, with no user intervention required.
A background service continuously monitors USB link status, DHCP availability, routing, and DNS configuration. When Internet Connection Sharing is detected on the host, gateway and DNS settings are applied automatically to provide seamless internet connectivity over USB.
Why no USB serial console?
CDC-ACM (USB serial) is intentionally excluded. Windows cannot bind both RNDIS/ECM networking and ACM serial interfaces to a single composite USB device using one .inf file without vendor-specific drivers.
Troubleshooting
If the connection does not work immediately, consider the following checks:
Hardware and cabling
Ensure the correct USB/OTG port is used (on Zero models, this must not be the power-only port).
Connect directly to the host PC, avoiding hubs or docks that may interfere with OTG negotiation.
Use only one Raspberry Pi in gadget mode at a time to prevent interface conflicts.
If the device reboots or disconnects repeatedly, insufficient power may be the cause.
ICS and DHCP
Allow up to one minute after enabling ICS for DHCP negotiation.
On Windows, disable and re-enable ICS if the interface shows as shared but no IP address is assigned.
Remove or disable unused Ethernet adapters to avoid routing conflicts.
Hostname resolution
If ssh [email protected] does not resolve on Windows, install mDNS/Bonjour support or connect using the assigned IP address.
Source code and downloads
Although USB gadget mode is now included by default in Raspberry Pi OS Trixie, all source code, documentation, and the Windows driver installer remain publicly available. The repository also includes an issue tracker and reports from real-world deployments, particularly related to ICS behavior on different host systems.
Wrapping up
USB gadget mode significantly improves the Raspberry Pi experience as a plug-and-go development platform. No Wi-Fi configuration, no HDMI output, no keyboard, and no IP address discovery are required. A single USB cable is enough to power the device, establish a network connection, and begin working via SSH.
The solution is designed to be accessible to newcomers while remaining robust and scalable for advanced users and larger deployments. Ongoing updates will continue to refine host detection, Internet sharing behavior, and diagnostic capabilities, with community feedback playing a key role in further improvements.
Transfer Multisort Elektronik (TME) is one of the world’s largest global distributors of electronic components, electrotechnical parts, workshop equipment, and industrial automation. The catalog includes over 1,300,000 products from 1,300 leading manufacturers. TME’s modern logistics centers in Łódź and Rzgów (Poland), with a combined area of over 40,000 m², ship nearly 6,000 packages daily to customers in more than 150 countries.
TME also invests in the development of knowledge and skills of young engineers and electronics enthusiasts through the TME Education project, and supports the tech community by organizing the TechMasterEvent series, promoting innovation and experience exchange.